IMAGES MUST BE EDITED IN PS OR LR BEFORE CREATING.
Use adjustments in PS and compress (select all adjustment layers by holding down the command key and selecting the adjustment layers and image layer than hit e).


Part 1- Surreal Glass Spheres
Watch the video below for how to create the Surreal Glass Sphere images. My examples above are not complete. After watching the video you should know why (Hint- Check for Understanding).
For the Surreal Sphere Part of this project you will:
Use your knowledge of Filters (Distort- Spherize) and Masks
Create 3 Unique images
Title each image and write a 3 to 5 sentence Artist Statement about each place.
Post on a New Weebly Page titled Abstract Photography
For Credit:
Must have 3 unique images using the method below
3 titles
3 Artist Statements
TURN ON THE CLOSE CAPTION AS THE ARTIST HAS A HEAVY ACCENT.
Part 2- Polyscapes (Directions)
For the Polyscape Part of this project you will:
Create 3 Unique images
Title each image and write a 3 to 5 sentence Artist Statement about each place.
Post on your Weebly Page titled Abstract Photography
For Credit:
Must have 3 unique images using the method below
3 titles
3 Artist Statements


For the Polyscape Part of this project you will:
Create 3 Unique images
Title each image and write a 3 to 5 sentence Artist Statement about each place.
Post on your Weebly Page titled Abstract Photography
For Credit:
Must have 3 unique images using the method below
3 titles
3 Artist Statements
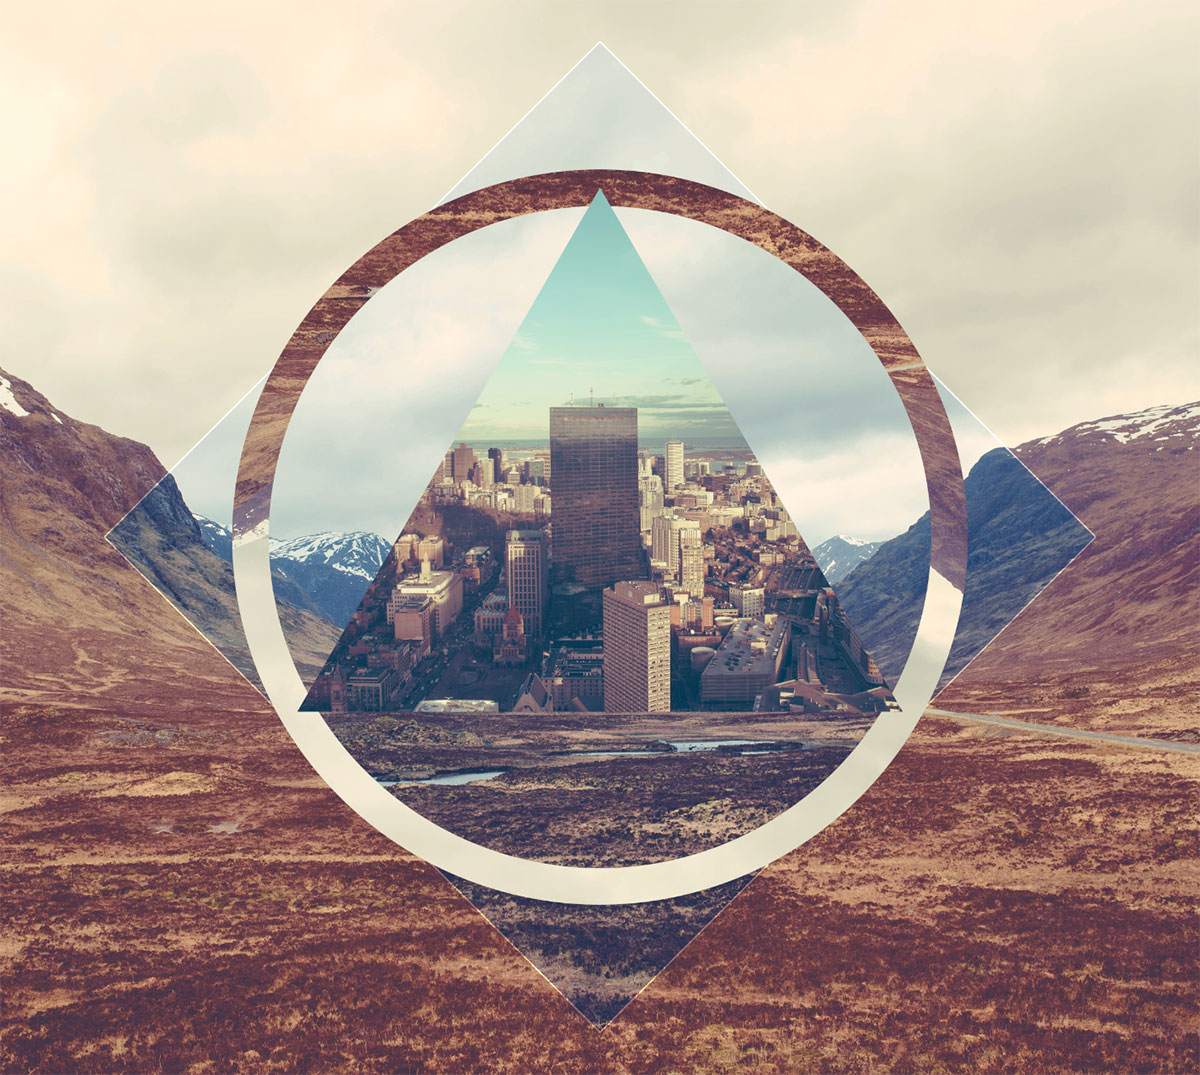
The image I’ll be creating as part of this tutorial combines the photographs of rural Lochearnhead and a contrasting cityscape. Polyscapes often make use of beautiful landscape images, or even pictures from outer space. These photos are then cut and pasted into a digital collage, using Photoshop’s editing tools rather than scissors and glue. The addition of geometric shapes add an abstract element to the artwork, I’m using a mix of squares, circles and triangles. Follow these steps to recreate this design, or experiment with different assets to achieve a unique result every time!
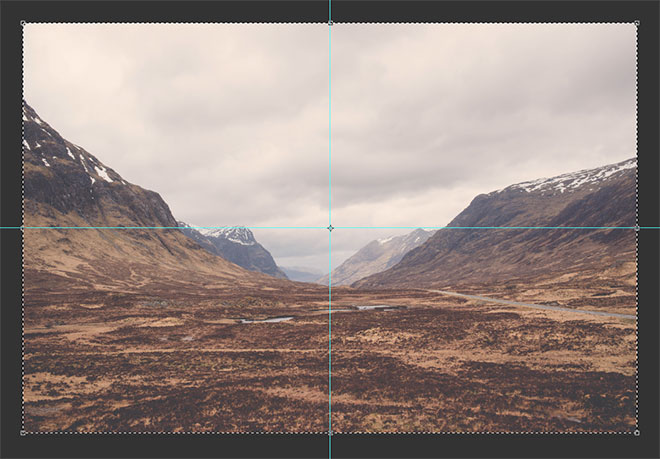
Begin by finding a base photograph to work with. I used the wonderful Unsplash.com to find this landscape photograph of Lochearnhead by Drew Collins. Open the image in Photoshop and centre two guides on the screen. The method I prefer is to Select All (CMD+A, or CTRL+A on Windows), right click and select Transform Selection, then drag out guides from the rulers and snap them into place onto the selection handles.
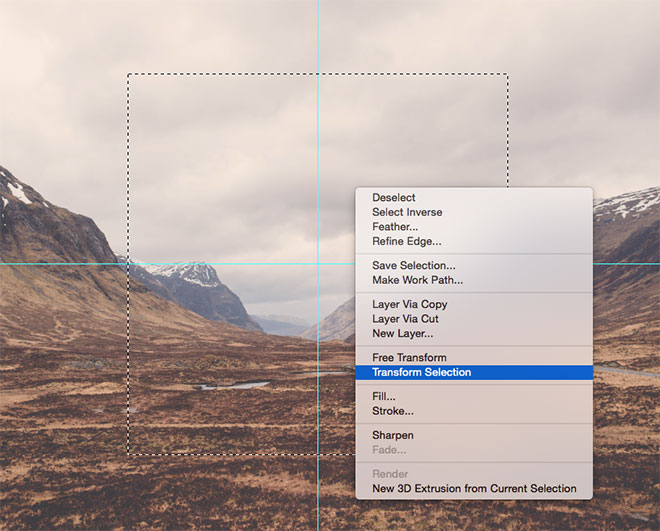
Select the Rectangular Marquee tool and hold the Alt and Shift keys while dragging out a square from the centre of the guides, then right click and select Transform Selection.
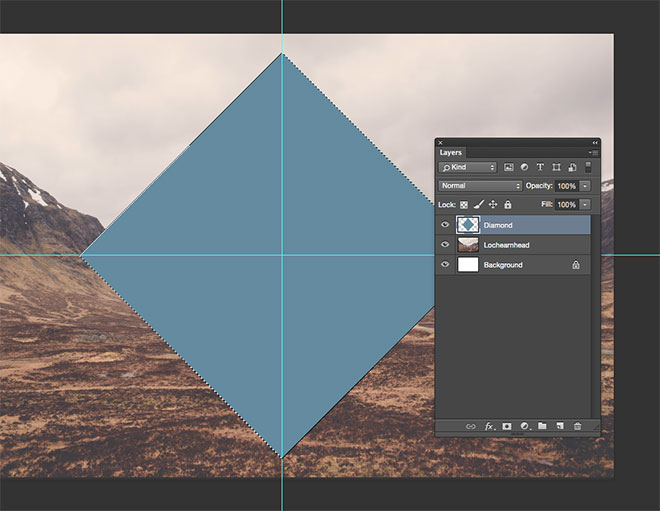
Rotate the selection by 45°, then choose a fill colour from the foreground colour picker (such as #51788f) press CMD+Backspace to fill the area. Use the shortcut CMD+D to Deselect.
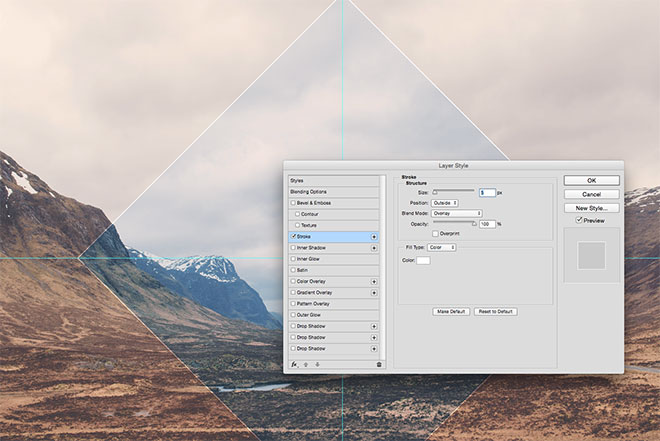
Change the blending mode of the square layer to Overlay, then double click the layer and add a Stroke layer style. Set the options to 5px, Outside, Overlay and White (#ffffff).
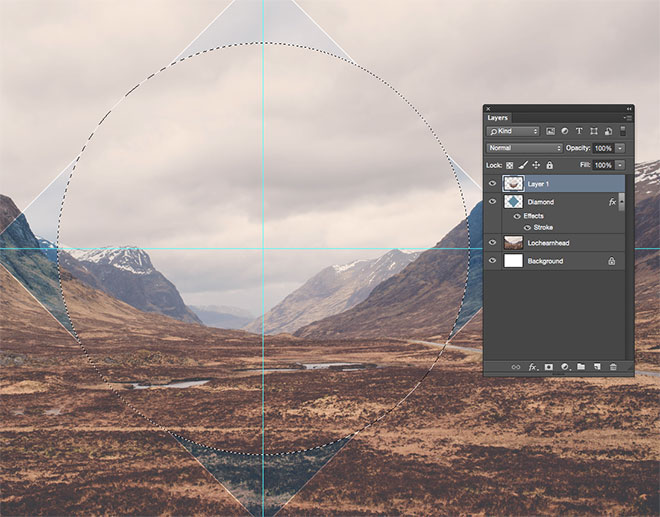
Select the Elliptical Marquee tool and draw a circular selection from the centre that’s slightly bigger than the diamond/square shape. Activate the photograph layer and take a copy using CMD+C, then paste the clipping onto a new layer and drag it to the top of the layer stack.
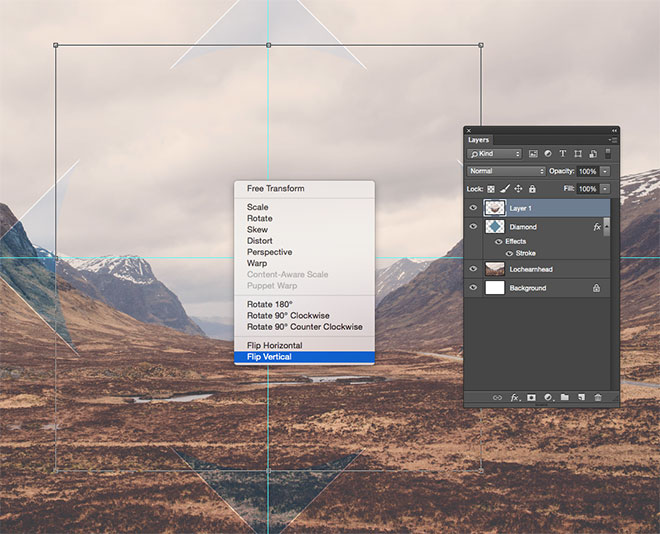
Press CMD+T to Transform, then right click and select Flip Vertical from the menu. This mirrored effect is commonly used in Polyscape images.
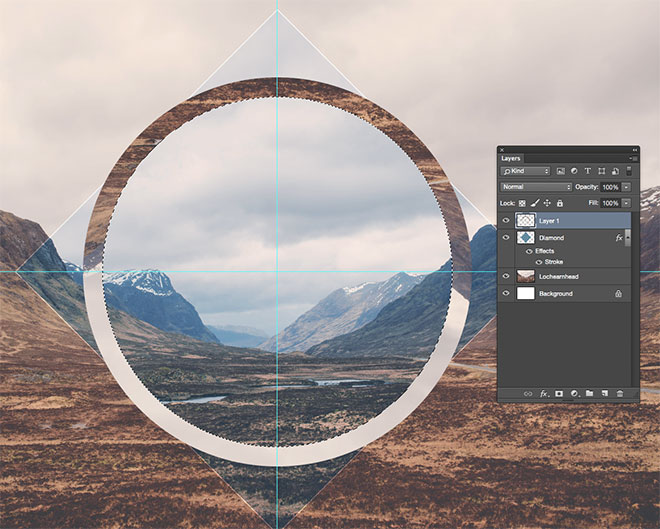
Hold the CMD key and click the thumbnail of the circle layer to loads its selection. Right click and choose Transform Selection, then scale the selection down while holding Alt and Shift. Hit Enter and delete the selection to leave a ring shape.

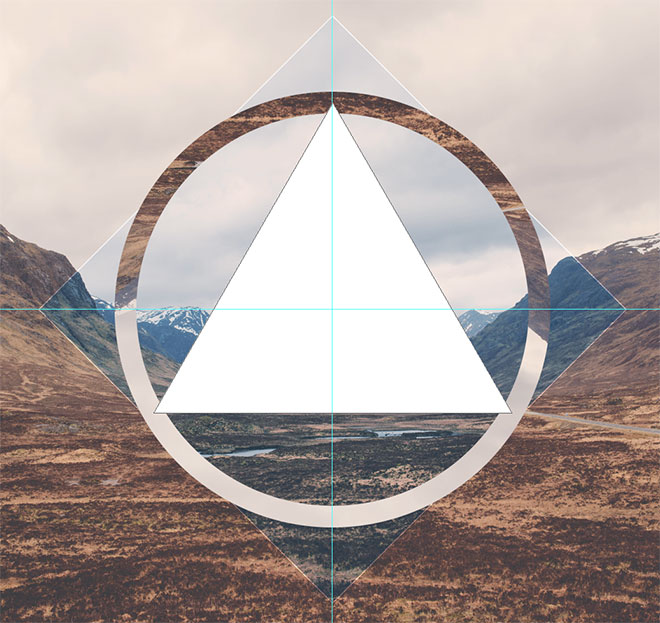
Choose the Polygon tool and set the number of sides to 3 in the top toolbar. Drag a triagnle shape from the centre guides while holding Shift (no ALT key this time!). Enlarge it enough to overlap the circular ring.
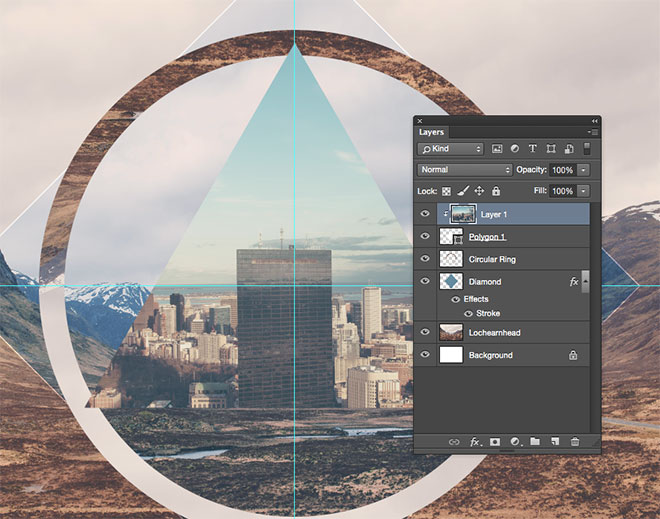
Find a second image to use in the polyscape, such as this city photograph by Anthony Delanoix. Paste it into the Photoshop document, then hold the ALT key and click between this layer and the polygon layer below it to create a clipping mask.
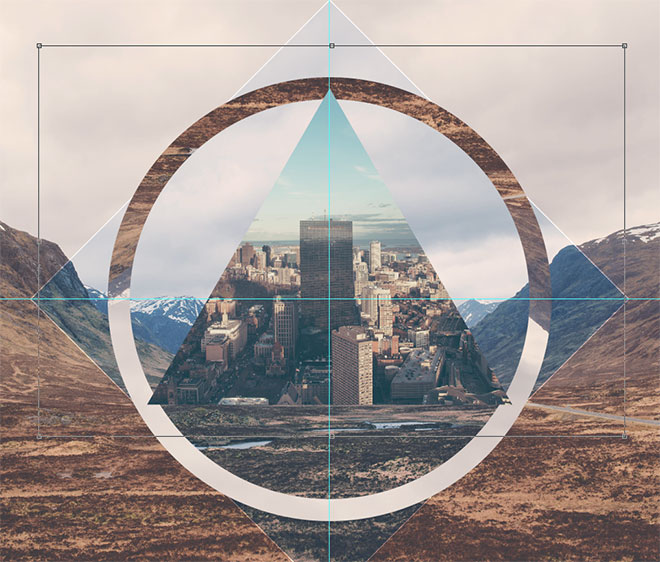
Use the CMD+T Transform shortcut to scale the cityscape to size so its contents fill the triangle shape.
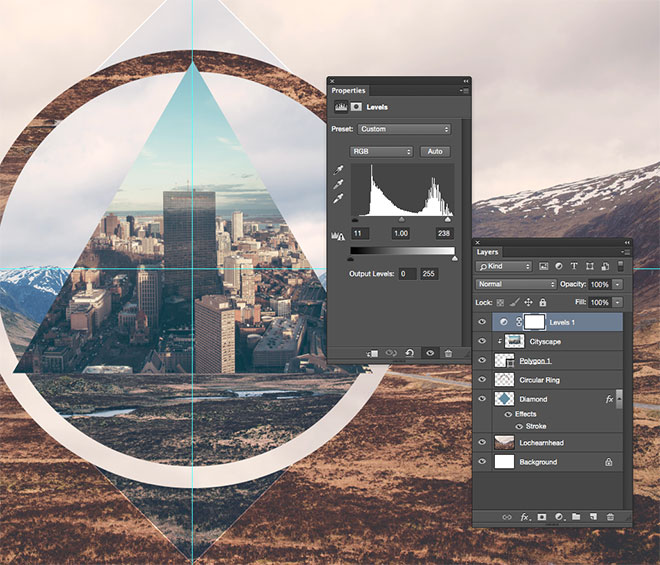
The Polyscape layout is complete, now let’s add some colour grading and finishing touches. Add a Levels adjustment layer and move the shadows and highlights sliders inwards slightly to boost the contrast.
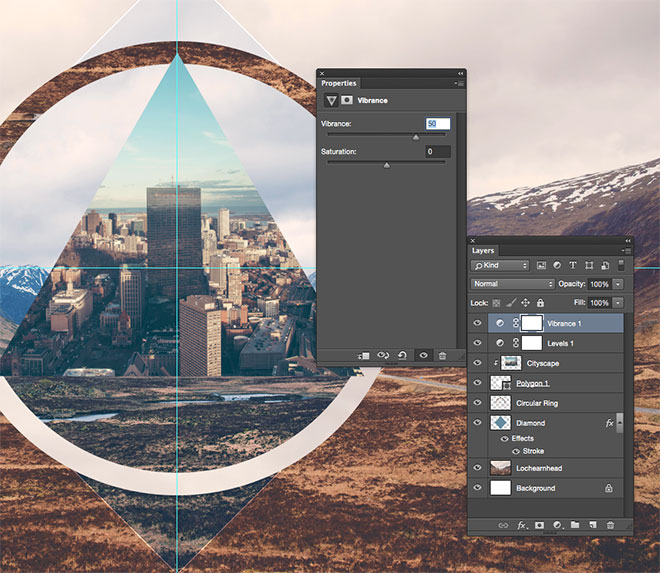
Add a Vibrance adjustment layer and increase the Vibrance level to around 50 to enhance the colours.
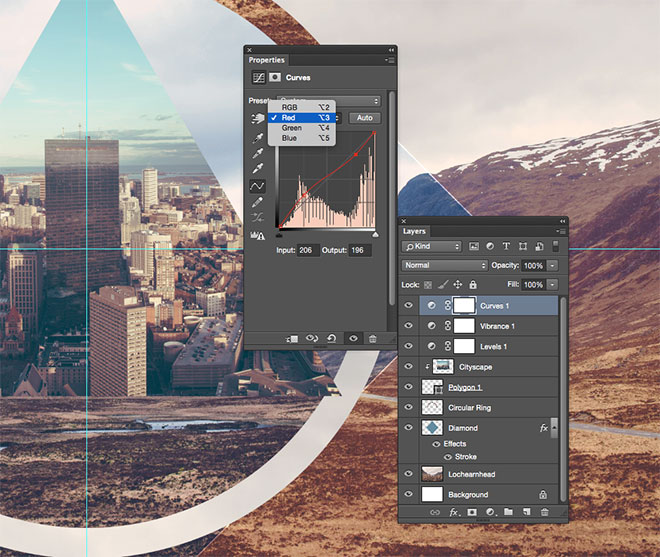
Finally, add a Curves adjustment layer and change the drop down menu to select only the Red channel. Move the curves line to increase the reds in the shadows and decrease them in the highlights.
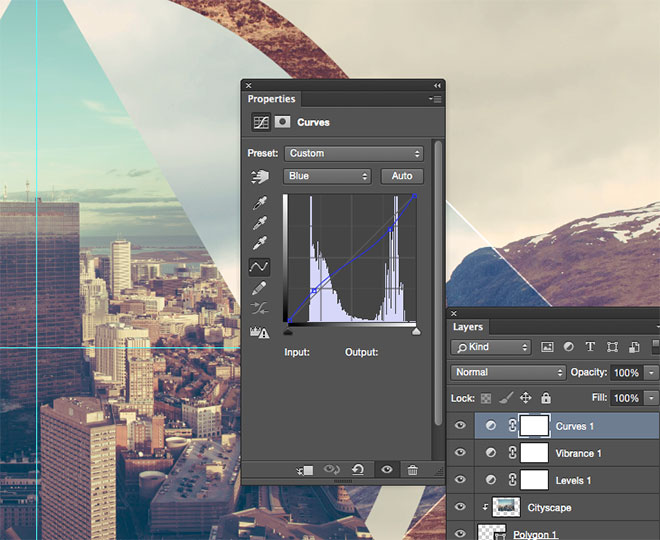
Repeat the process with the Blue curves channel, keeping an eye on the live preview to alter the colouring effects to suit your preference.
The final artwork boasts all the popular aesthetics of the Polyscape style, with a mix of landscape and cityscape images, geometric shapes, mirrored clippings, colour overlays and grading effects. Use these steps to create a series of Polyscape artworks each with different shapes and photographs.
https://blog.spoongraphics.co.uk/tutorials/how-to-create-an-abstract-polyscape-in-adobe-photoshop